Welcome to Tech 1!
- Some of you might remember me from your Ergonomics course last year
- This time the course site is even better! Check gyanl.com/tech1
- Our weekly slot is 2:15-4:15pm on Tuesdays.
- I will be travelling so some classes may get rescheduled. Not as much as last year though, and I will give as much advance notice as possible.
In this Course
The title for this course is:
Web & Mobile Ecosystem Fundamentals
Course Objective: Gain a foundational understanding of the core technologies, platforms, and concepts that underpin the modern web and mobile ecosystems, essential for product and design professionals.
I will not follow the syllabus too strictly - this will be a hands on course where you will build working apps and websites. I don't expect you to become engineers in one course over a semester, but we'll use AI to generate code and build high-fidelity, working prototypes.
- SyllabusSyllabus
See also: Lectures · Class Schedule · Grading · AI Policy
Course Title: Tech 1 — Web & Mobile Ecosystem Fundamentals
Course Objective: Gain a foundational understanding of the... - AI PolicyAI Policy
See also: Grading · Syllabus
In many courses, an AI policy is a list of things you can't do. This course is different: using AI to generate code is the expected way of working here. The sk...
How this course works
- You will build from week one. Using AI tools, you will generate, modify, and deploy real web applications — starting with a personal webpage in the very first session.
- Fundamentals follow experience. Each week we dissect something you have already built: "you made this — now let's understand what HTML, hosting, and DNS actually did for you."
- AI is the medium, not a module. You are expected to generate most of your code with AI tools (Claude, Cursor, v0, Lovable, etc.). The skill we are building is directing these tools well — which requires understanding the stack conceptually.
- The course converges into a final project. The final project of the course is a build sprint where you take a product idea to a working, deployed application, presented at a Demo Day.
Admin
- Who is the Class Rep?
- Create a WhatsApp group for the class
Setup (30 min)
Get your toolkit working — we use all of this every week:
- Create a GitHub account — github.com (use an email you'll keep)
- Download GitHub Desktop — desktop.github.com (Mac/Windows)
- Download a code editor — VS Code (or Cursor if you want AI built in)
Pick your username carefully
Your username becomes your address on the internet:
github.com/yournameyourname.github.io← your website will live here
- Lowercase, short, easy to type
- Something you'd put on a CV — recruiters will see it
gyanl✓ ·xX_gamer_2007_Xx✗
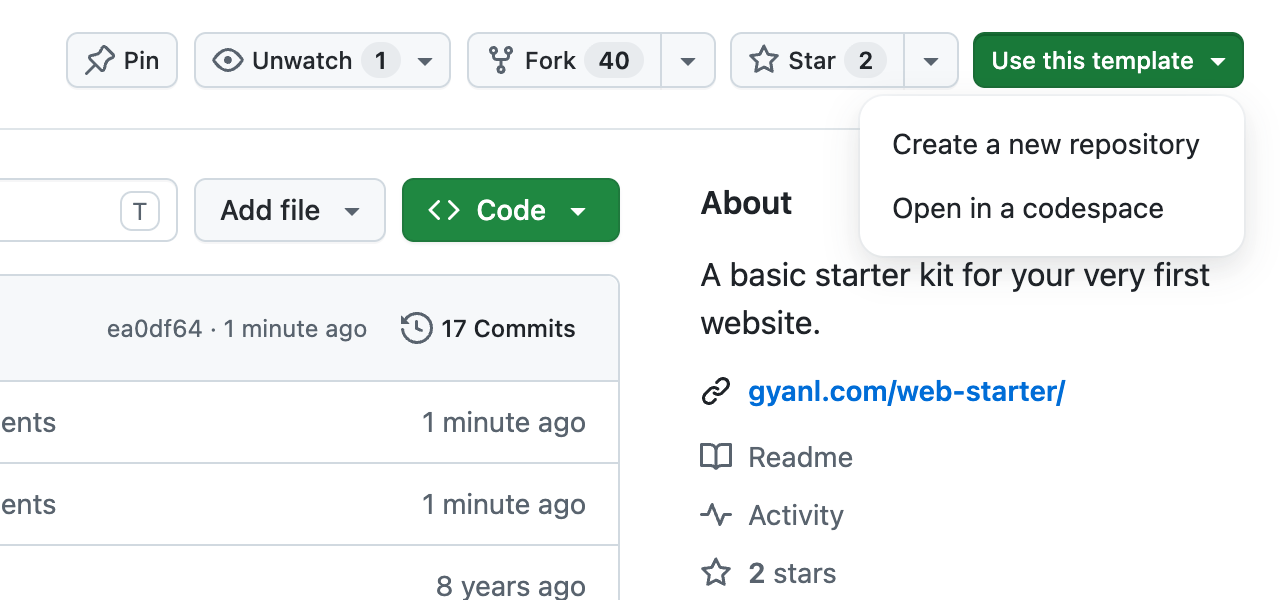
Create a repo from this template
gyanl/web-starter
Use this template → Create a new repository
We just used some new terms
In this course I will frequently make you do something and explain later why you did it.
-
What's Github? A code storing and sharing site. You can also use it to make your website live on the internet.
-
What's a repo? A repository is a folder of code. You can store it on GitHub. There are some very good reasons to do this that we'll get into later.
Every web page is made of 3 things
Think of a web page like a person:
- HTML is the content — what should be on the page and in what order
- CSS is the styling — fonts, colours, borders, padding
- JavaScript is the interactivity — it makes things move and respond
Your new repo has one file for each: index.html, style.css, scripts.js
HTML is your content, with labels
The labels are called tags. They usually come in pairs — one to open, one to close:
<h1>My name is Gyan</h1>
<p>I like making websites.</p>
Some tags don't need closing tags - like the image tag
<img src="photo.jpg">
What tag is what?
You already know this from design — it's just hierarchy:
<h1>to<h6>— headings, big to small<p>— a paragraph of text<a>— a link to another page<img>— a picture<li>— one item in a list
When you're unsure, ask AI: "what tag should I use for ___?"
CSS describes how things look
Point at something, then describe it:
h1 {
  color: red;
  font-size: 60px;
}
Read it out loud: "Every h1 on the page: make it red, make it big."
The loop you'll use all semester
- Change something in one of the files like
style.css— try thebackgroundcolor - Save the file
- Refresh the browser
JavaScript makes it respond
JavaScript is instructions that run when something happens:
alert("Hello!");
This shows a popup the moment the page opens.
Open scripts.js in your repo — this line is waiting inside, switched off. Remove the // and refresh.
Do you need to memorise this?
No. AI will write most of your HTML, CSS and JS this semester.
But now, when you open a file, you'll know:
.html→ the content.css→ the looks.js→ the behaviour
That's enough to direct the machine.
Deploy: put it on the real internet
Right now your page only exists on your laptop. GitHub Pages serves it to the whole world, free:
- On your repo's page: Settings → Pages
- Under Build and deployment: Source = Deploy from a branch
- Branch: main, folder: / (root) → Save
- Wait a minute, refresh — GitHub shows your URL:
https://yourname.github.io/your-repo/
The publish loop
From now on, updating your live site is:
edit → save → commit → push → live
- Commit = save a snapshot of your changes (in GitHub Desktop)
- Push = send it to GitHub
- About a minute later, the live site updates
If you see a 404: wait, refresh, and check your homepage is called exactly index.html.
Ship something
- Exercise: Exercise - Ship a Page with GitHub PagesExercise - Ship a Page with GitHub Pages
Put your website on the real internet — free, today
You already have a repo made from web-starter. Now we tell GitHub to serve it as a live website. This is called GitHub Pages — free hosting for ... — personalise your page, push it, and put it live - Step-by-step reference you can keep coming back to: Help - Publish a Page with GitHub PagesHelp - Publish a Page with GitHub Pages
What you'll end up with
A live website at https://YOUR-USERNAME.github.io/YOUR-REPO-NAME/ that anyone can open, made from a single index.html file.
You need: a GitHub account, and GitHub Desktop ... - Everyone leaves with a URL that works on their phone
Homework
- Finish any setup that got stuck
- Exercise - Redesign your Home Page in FigmaExercise - Redesign your Home Page in Figma
Make your home page your own
You have a live website, but it looks like the template. Before we learn CSS next week, decide what you actually want your own home page to look like — in the tool you... — bring your page into Figma and design it properly. Next week we turn it into CSS. - Apply for the GitHub Student Developer Pack at GitHub Education · GitHub - free credits and tools; needs your university email/ID - approval can take a few days — apply today.